Friday, February 28, 2014

Quinoa Stuffed Stripetti

Want a filling and nutrient dense dinner idea? Try stuffed stripetti! 

It's vegetarian and gluten-free. You can omit dairy. 


Not knowing what to do with my stripetti squash, I considered my background in culinary acts of goodness. Yeah, I'm a 'wing-it' kind of chef! I was more than pleased with the outcome of this dish! 

A stripetti's appearance resembles a watermelon but its texture is similar to that of a spaghetti squash and its flavor closer to sweet potatoes. Sounds intriguing, yes? YES!!

After doing some research on how to prepare, I learned the best way was to bake it on 375* for 45 minutes in its wholeness - not cutting, piercing or anything. Just put it in a dish with a little bit of water and roast. It's a bit tough to work with if you avoid this necessary step. 

While your stripetti is roasting, let's prepare the filling. I used no animal protein in this recipe. Instead I used quinoa. More info about this fabulous grain here

Ingredients/Preparation:

1) Quinoa cooked in your own vegetable stock (as seen here) + 1 tsp cumin + 1/4 tsp cayenne; mix and cook covered (follow directions on package). 

2) Zucchini (any green vegetable you'd like!) in a quick stir-saute with 2 T EVOO, 1/2 tsp minced garlic, and 1/2 tsp basil.

3) 8 oz of spaghetti or tomato sauce (or yours done here).

4) 8 oz diced tomatoes (choose fresh) marinated in 1/4 tsp EVOO, 1/2 tsp basil, and 1/8 tsp sea salt. 

5) Mozzarella cheese (optional). 


When stripetti is done roasting, wait for it to cool slightly then cut it lengthwise. Remove seeds with a spoon. 

Spoon cooked quinoa into the stripetti. Top with tomato sauce, zucchini, a sprinkle of mozzarella cheese, and diced tomatoes. Carefully cut it in half. Serve! (You won't be eating the skin - it is kind of dense. If you roasted it long enough, it'll peel off easily.)

This recipe packs flavor. I'm glad I had my own tomato sauce on hand because I believe it gave it a step up in deliciousness! Experiment with different vegetables - add more! Some options: Broccoli, Purple Cauliflower, Spinach! Have fun with it!

Buon Appetito!! 

Choose, eat, and live well! =)


Other varieties of squash recipes can be found here:


Monday, February 24, 2014

DIY Tomato Sauce

Got Tomatoes? Make Tomato Sauce, of course! 


I've wanted to make my own tomato sauce for a minute now. Now that I have made my very first test batch, I can be sure to replicate this recipe (doubling, tripling, etc) for the next time I get an abundance of tomatoes. Though the flavor profile was spot on, it was a bit loose and I know it's because of the lack of tomatoes I had on hand. 

I've seen similar recipes online that used canned tomatoes. You can do this in a pinch but I recommend fresh (and organic) whenever possible. 

This recipe yields about 14 oz of tomato sauce. You'll need a scale to weigh your diced tomatoes. You can gently boil the tomatoes so the skins can be removed. 

Ingredients:
14 oz of diced tomatoes (*fresh when possible; use your scale)
* You'll need up to 1/4 cup of water since you're not using canned tomatoes.
1 clove of garlic finely chopped
3 T EVOO 
1/2 cup diced bell pepper (I like yellow or orange best plus it adds some color.) 
1/2 T oregano
1/2 T basil
1/2 tsp salt 
1/4 tsp sugar (raw or organic)

Preparation: 
1. Dice 4 large tomatoes preserving as much of their juices as possible.
2. Dice bell pepper and garlic. 
3. In a pot, heat EVOO on medium and add garlic, oregano, and basil. Cook until aromatic or about 3 minutes. 
4. Add bell pepper and cook for another 3 minutes. 
5. Add tomatoes with the reserved juices and stir to incorporate the flavors of the ingredients and cook on low heat for 30 minutes, stirring occasionally. 
6. When sauce is nearly done, add the sugar and salt. Stir.
7. If you find that your sauce is too chunky, you can add in up to 1/4 cup of water. 


You can serve it two ways: 
1) chunky (which would be superb over bread for bruschetta) or
2) smooth (using an immersion blender which I did for this recipe).


Choose, eat, and live well! =)

Monday, February 17, 2014

Complete Breakfast in a Muffin


I get it! Microwaves are not the best idea for cooking a meal but let's face it, most Americans do use one almost daily! And, I'd rather see a family preparing real ingredients from scratch in a microwave then to see them heat up a frozen dinner. We all start somewhere. 

Today's recipe is an update from my post from over a year ago, entitled, Let's Take the Monotony Out of Breakfast. I made it slightly different this time around as I'm preparing for a collaborative event with a Tupperware representative and I'll be sharing the benefits of eating Juice Plus+. We're going to focus on making healthy meals and snacks for families on the go and several stations will be set up as she and I demo plant based nutrition in her serving pieces. 

Onward to the recipe!


Ingredients:
2 tbs of ground flax
2 tbs of chocolate Complete (like this)
1 T applesauce
1 egg
1 tsp baking powder
1/2 tsp cinnamon 
1 tsp coconut oil
1.5 tsp coconut sugar 
1/4 tsp raw honey

Makes 1 Complete Breakfast in a Muffin but it can serve two! 


Preparation: 
Add ingredients in the order above to a coffee mug or similar microwave-safe cup. Mix thoroughly and cook in your microwave for 1 minute to 1 minute and 20 seconds. Let it sit for 2 minutes. It will still be hot so be careful.


Top with crushed nuts of your choice. Enjoy!


Choose, eat, and live well! =)

Thursday, February 13, 2014

Treating Yourself Naturally - Bath Time Done Right!

Just over 5 years ago, I was using not so natural products on my body but thought more about my son's wellness and switched to Original Sprout, goat milk soaps (made from local artisans), and coconut oil when he was 6 months old. Almost four years ago, I was made aware of how much I should be considering my own body care wellness... and I started looking at ingredients of consumables. It was an easy decision when it came to my little one because I wanted to protect his 'new' skin from as many harmful elements as possible and preserve his 'youth.' 

If you're new to the scene of natural products, I would like to share with you two things: 

1) Start slow - replace one product at a time (take baby steps);
2) Keep learning.  

This post shares with you the natural products I use for my showering routine. I've invited Monica Unseld, of The Purple Green Blog, to share with us tips on taking a luxurious [detox] bath. She will share her personal recommendations for toxic-free products. 

When I thought about how much I have grown in these short few years, I feel empowered that the decisions I make in the future regarding natural wellness will become easier and easier. It helps that I'm connected with other mamas who desire the same. They inspire me to keep learning! I hope you can be encouraged, too!


Let's Get Started!


Before showering:

Step 1) Dry brush your skin in upward strokes towards the heart; it helps remove dry, dead skin, stimulates the skin, and gently exfoliates it. Start out slow because it will feel abrasive at first then after a few uses, it will feel invigorating to the skin. 


While in the shower:


Step 2) I use two soaps; one is for my body and the other is for my face. I buy goat milk soaps from local artisans who use essential oils and not synthetic fragrance. I also prefer to use an activated charcoal goat milk soap bar that is great for reducing pores and I use it on my face and pits only. When I'm out of the goat milk soap, I use Dr. Bronner's soaps. The peppermint is my favorite because it 'wakes up' the skin! Dr. Bronner's soaps range in cost from $4-6 (per bar). The goat milk soaps from the two businesses are about $5 per bar. 

Step 3) For a gentle in-the-shower exfoliation, I use coconut oil and baking soda (2:1). [For a gentle out-of-the shower exfoliation, I use almond meal and water (3:1). After the almond meal exfoliation, I use a honey and lemon juice mask (2:1).] With the coconut oil and baking soda mixture, the honey and lemon juice may not be needed. 


Step 4) For a body scrub, I mix coconut oil, sugar, and essential oils together and store it in a mason jar. It is very effective for dry feet. I love to walk bare foot almost year around and in the winter, my feet are naturally drier so this has been a life saver. I use it with a pumice stone kind of like this


Step 5) For shaving (best for females), I have two options: The first, is using the same coconut oil and baking soda as outlined in Step 3 or two, taking the oil off the top of the body scrub in Step 4, and applying it directly to my legs and pits. It is gentle and softens the skin without any irritation. If you find that you have irritation, you may need to reduce the baking soda or switch the essential oils (or omit). 


Step 6) For washing hair, I have gone with a 'no poo' (I prefer no chemicals) but I recently went back over to the other side - buying my shampoo but I look for certain ingredients to avoid. The best place to start when looking for a natural product is to look through the ingredients to see if there are any synthetic fragrances. This usually weeds out most of the products I do not want to use. I wrote a post about my first experiences of going 'no-poo' here and then I used a new and improved no-poo recipe from Natural Living Momma (NLM)

As seen in my own no-poo post, before I decided to take this approach, my hair was dry, breaking off, and looked a hot mess!  If you didn't read my post, I must add that I do a rinse after no-pooing (while in the shower). I mix water with apple cider vinegar (ACV) (8 oz of water to 1 T of ACV) and lemon juice with water (8 oz of water to 1 T of lemon juice). I do the ACV first and let it sit on the hair as I bathe then I rinse it out and then apply the lemon juice mixture; rinsing it right before I get out. It softens my hair and makes it easy to brush. Instead of using a bath towel, I wrap my hair up in a cotton white-T which softens the hair cuticle and keeps frizz down. Leaving your wet hair in the t-shirt can cause frizz (around the hairline) if you don't take it down as soon as you can to brush it. 

Note: I only wash my hair every 4-5 days. I went to hair school in '97, graduated in '99 and have never dyed my hair, ever! I have never washed my hair daily due to its thickness and it's way too much work anyway. Pony tails are great for those days I'm just not feeling it and I know some mamas can relate! I know from personal experience natural oils are good for hair growth and hair repair. Plus after going chemical free, I've seen my hair come back to life after moving to an area with very hard water and a very dry climate. 

Out of the shower:


Step 7) I use my own body butter or just coconut oil on my skin and face. I also will use products from small businesses that use quality oils and essential oils (not synthetic fragrances). My friends from Sky Fire Ranch Soaps are no longer selling their products due to circumstances beyond their control but I thoroughly enjoyed their body butters (and goat milk soaps).  


Step 8) I use natural deodorant from Handcrafted Honeybee and Primal Pit Paste link to this is on my products tab). I went 'natural' in September of 2012 using plain milk of magnesia to detox my body from chemicals in the store brands. It took 6 weeks to detox then I used DIY deodorants using coconut oil as the base ingredient with baking soda and essential oils. And, while they worked in the colder months, it became a liquid mess in the hot months. So, that's why I ended up trying the other natural deodorants from the companies just mentioned and I have been pleased ever since! 

Step 9) Since I went no-poo, my hair has been easier to brush / comb after it's been washed. With the no-poo recipe I'm using from NLM, I have the same results - effortless brushing. After it's been brushed, I apply a pea-size amount of coconut oil throughout my hair concentrating most of it on my ends (from the nape of my neck to the ends). If using coconut oil alone doesn't help, Nearly Natural Momma shares her DIY detangler that I've made and have used. It leaves the hair silky but it smells a lot like ACV - which I'm not a fan of (so I spray distilled essential oils on my hair to mask the scent of apple cider vinegar) and it works great! In between washes (as I don't wash my hair daily), I spritz my hair with water and apply more coconut oil or sometimes I use avocado oil. 


Step 10) I can now let my hair 'air-dry' - this was never possible before no-pooing. I have naturally wavy hair and with the no-poo and other natural recipes I've used, it has helped spring life back into my hair! 


There you have it! Showering from start to finish using all natural products. 


Bath Time Indulgences 


Let's learn more about an indulging bath time and the importance of a natural detox bath with Monica:


It's stressful having to think about all of the toxins we face in our daily lives; toxins in our personal care products, toxins in our home, toxins in the air we breathe. I bet a nice relaxing, candle-lit bath sounds good right about now, doesn't it? Well, fortunately, we can put our baths to work to help us remove some of the toxins we come into contact with each day. They're called detox baths and there are several recipes. 


Detox baths are actually an ancient practice that goes back thousands of years. Both the ancient Romans and ancient Greeks had methods for detoxification by bath. Modern methods have reemerged in recent years. While the science behind them is emerging, the ingredients used are non-toxic and have been shown to have health benefits. As always, if you are on any medication or have a medical condition, please pass your detox bath ingredients by your doctor first. 

According to Discovery Health, Epsom Salt is a good ingredient for a detox bath due to the magnesium sulfate which is the chemical compound in Epsom Salt.
"Magnesium helps keep your bodily functions running smoothly, including some of the pathways that lead toxins right out of your body. Sulfate helps to strengthen the walls of your digestive tract so that it's easier to release toxins. As a compound, magnesium sulfate also raises the amount of digestive enzymes in the pancreas. The compound also helps in purifying and detoxifying your body of heavy metals [source: Epsom Salt Council]. All of these functions help to aid the body in getting rid of toxins. However, there's not a lot of medical research documenting how much of a detoxifying effect Epsom salt may really have."
Detox bath tips adapted from Detox Bath Why and How:
  1. Do not eat immediately before taking a detox bath. Drink filtered water.
  2. Add 2 cups of Epsom Salt to a tub of hot water (for a large tub add more).
  3. Add 1 cup of baking soda, if your water is unfiltered. This helps neutralize the chlorine and helps with mineral absorption. FYI: Baking soda is aluminum-free. See Crunchy Betty's statement.
  4. Immerse yourself up to your neck and soak for at least 20 minutes. While you're in the bath, practice some breathing exercises. 
  5. Cautiously and slowly rise and get out of the tub. You may feel light-headed and dizzy. 
  6. Take a shower in cool water. This will ease any feelings of dizziness. 
  7. Use non toxic products during the shower as your pores will be open and read to absorb any products you use. This also applies to when you dry off. *See my recommendation below.
  8. Rest and rejuvenate.
Other sources for detox baths:

Monica E. Unseld, Ph. D

Share with us ---

What are your go-to resources / recipes for using all-natural products? 


Choose, eat, and live well! =)


Friday, February 7, 2014

Let's Get Snacking -- For kids to adults!

Let’s Get Snacking!

Great for kids’ snacks, brown bag lunches, *grazing trays, and pre/post workouts.


What is a *grazing tray? It is a way to prepare, introduce, and/or offer children (adults can do this too) different foods in a muffin or ice cube tray. 

A client recently asked for a list of green-yellow light food snacks she can pack for her family. She mentioned the tried and trues were getting a bit old. So, I created this list of recipes and ideas from several bloggers and yours truly. After creating such a great list, I knew I had to share it here for more families to benefit. Not every selection has a recipe. You can search Pinterest for ideas. I have been given written consent to use the links in this post. The +s allow you to differentiate (I hope easily) between the food selections.


I'll be sharing more than 50 recipes from over 30 bloggers!! There are 3 categories: Pairings, Homemade, and Miscellaneous. The lists are alphabetized. I will close with several L.E.A.N. style tips for getting families to eat more of the good stuff!

Pairings - Are nutrient dense foods paired together that provide satisfaction (keeps you fuller longer) and helps to increase natural energy (because [real] food is fuel).  


+ “Ants on a log” – Celery with natural PB and raisins
+ Apples with drizzled raw honey and sprinkled cinnamon
+ Carrot chips with flax yogurt dip {Recipe from A Harmony Healing.} 


+ Chopped fruit with rice crackers
+ Cucumber sandwiches with tomato and /or tuna 
+ Frozen banana bites {Recipe from Conveying Awareness.}

+ Fruit (or vegetables) with a nut butter (2 options below). 

{Almond butter with chocolate recipe from Girl Meets Nourishment.}
Girl Meets Nourishment
{Peanut butter recipe from Cheeky Bums Blog.}


+ Graham crackers with nut butter, sliced bananas and coconut chips. 
+ Homemade trail mix 
+ Kabobs – vegetables and /or beef. {Beef recipe via The Organic Kitchen.}


+ Natural peanut butter with organic strawberry jam on whole wheat bread
+ Parfaits – Applesauce with homemade goodies {Recipe via Jar O' Honey.}
+ Raw veggies dipped in hummus 
+ Rice crackers with cream cheese or PB with sliced fruit on top
+ Skewers - fruit and vegetable types (2 options below)

{Vegetable skewer by Honey, Ghee, and Me.}
Honey, Ghee, and Me
{Fruit skewer by Jar O' Honey.}

+ Stuffed apricots {Recipe via Homegrown and Healthy.}


+ Turkey and cheese roll-ups (add avocado for added nutrition)
+ Veggie sandwiches {Recipe from The Organic Kitchen.}
The Organic Kitchen
+ Whole grain waffles topped with fresh fruit
+ Whole wheat crackers with nitrate free lunch meat

Homemade:  


+ Almond Coconut bars {Recipe via Paleo Gone Sassy.}
Paleo Gone Sassy
+ Almond Date bars {Recipe via All Things Health.}

+ Apple Rings (grain free) {Recipe via Conveying Awareness.}

+ Banana Chips {Recipe via This Tree of Life.}       
This Tree of Life
+ Bean Quesadillas {Recipe via Daily Pea.}      


+ Chicken Salad {Recipe via Honey, Ghee, and Me.}
Honey, Ghee, and Me
+ Coconut Crisps {Recipe via Just Enjoy Food.}
Just Enjoy Food
+ Cucumber Snack {Recipe via Your Gardening Friend.}    
Your Gardening Friend
+ Dehydrated Fruits / Vegetables (3 options below)

{Basic food preservation via Don't Waste the Crumbs.}

{How to recipe via Kitchen Stewardship.}


{Kale chips via Little Owl Crunchy Momma.}
Little Owl Crunchy Momma
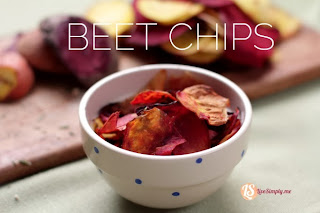
{Beet chips recipe via Live Simply.}

{Sweet potato chips recipe via Paleo Gone Sassy.} 

+ Deviled Eggs {Recipe via Just Enjoy Food.}
Just Enjoy Food
+ Egg Salad {Recipe mayo-less via The Good Long Road.}
The Good Long Road
+ Fruit & Nut Bites {Recipe via Natural Family Today.}

+ Fruit Snacks (with gelatin (not Jell-O); 5 options below)
{Recipe (strawberry) via An Organic Wife.}
An Organic Wife
{Recipe via Eat Play Love More.}

{Recipe via Girl Meets Nourishment.}

{Recipe via The Hippy Homemaker via Hybrid Rasta Mama.}

{Recipe via Mindful Mama.}
+ Granola (bars)
{Recipe via Completely Nourished.} 
Completely Nourished 
{Recipe via Hands On Learning 4 All.}
Hands On Learning 4 All
{Recipe (no bake) via Live Simply.}
Live Simply
+ Granola (loose; 2 options)

{Gluten-free granola recipe via A Harmony Healing.}


{Recipe via Live Simply.} 
Live Simply
+ Guacamole (2 options)

{Recipe via Completely Nourished.}


{Recipe with added veggies via Honey, Ghee, and Me.}
Honey, Ghee, and Me
+ Hummus (2 options)
{Recipe via Attainable Sustainable.} 


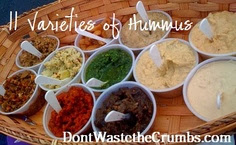
{Recipe with 11 add-ins via Don't Waste the Crumbs.}

+ Muffins whole-wheat {Recipe via Live Simply.}
Live Simply
+ No Bake Power Bites {Recipe via Convey Awareness.}

+ Peanut Butter [Chocolate] Bonbons {Recipe via Little Owl Crunch Momma.}

+ Raw Brownie Bites {Recipe via Live Simply.}

Wait, did YOU notice ALL of the chocolate recipes in a row?! 

+ Roasted Chickpeas “Poppers” (2 options: 1 spicy & 1 sweet)
{Recipe (spicy) via Pickle Me Too.}
Pickle Me Too
{Recipe (sweet) via Real Food RN.}

+ Spring Rolls with rice paper {Recipe via Happy Health Nut.}

+ Sweet Potato Tots (gluten-free) {Recipe via Real Food RN.}

+ Zucchini Bread (whole grain) {Recipe via Honey, Ghee, and Me.}
Honey, Ghee, and Me

Miscellaneous:


Almonds
Annie’s crackers
Apple wedges
Bananas
Carrots
Cashews
Celery
Cheese
Clementines
Cucumbers (peel skin if too thick)
Edamame (organic)
Frozen applesauce drops
Grapes (peel skin for kids under 12 months)
Pretzels
Raisins
Root veggies (raw or roasted)
Sunflower seeds


Extra tips: 


Take the normal food items your little one likes and cut them into different shapes or add ‘dips’ to accompany the food items. It will appear different and it will be fun for them and you!

Raise a salad lover following these tips: Serve it at the beginning of the meal, include lots of crunchy vegetables, add sunflower seeds or grated cheese, choose great greens, and serve a salad buffet by putting all the ingredients in different bowls and allowing everyone to choose what they want. 

Instead of packing fried chicken strips, try a grilled chicken sandwich, fish tacos, or a chicken salad. 

Always reach for water when thirsty. Bored of water? Infuse it! Add fruits and herbs to your water. It's pretty, tastes great, and it's the [real] vitamin water! 

To recap the featured blogs: 

A Harmony HealingAll Things HealthAn Organic WifeAttainable SustainableCheeky Bums BlogCompletely NourishedConvey AwarenessDaily PeaDon't Waste the CrumbsEat Play Love MoreGirl Meets NourishmentHands On Learning 4 AllHappy Health NutHomegrown and HealthyHoney, Ghee, and MeJar O' HoneyJust Enjoy Food, Kitchen Stewardship, Little Owl Crunchy MommaLive SimplyMindful MamaNatural Family TodayPaleo Gone SassyPickle Me TooReal Food RNThe Good Long Road, The Hippy HomemakerThe Organic KitchenThis Tree of Life and Your Gardening Friend.

Let me recommend a few Pinterest boards worth following. Some of them are collaboration boards featuring several of the bloggers from this post:
Real Food Cafe, Recipes Using Vegetables, Nutritious Snack Ideas, and Eat the [Real] Rainbow

Choose, eat, and live well! =)