Showing posts with label recipe. Show all posts

Wednesday, February 3, 2016

Joy [Almond Shortbread] Cookies

This post has been moved to my new blog on my health coaching website. You can find the recipe on Conveying Awareness.

Joy Cookies - Almond, Chocolate YUM - #ConveyAwareness


Choose, eat, and live well! =)


Wednesday, January 6, 2016

Apple Brownie Squares

This recipe has been moved to my new blog on my health coaching website. You can find it on Conveying Awareness

Apple Brownie Squares - #ConveyAwareness


Choose, eat, and live well! =)


Tuesday, February 10, 2015

Double Apple Muffins

Double Apple Muffins 

iConveyAwareness | Double Apple Muffins - Gluten and Dairy Free

Yet another recipe inspiration following the gluten-free and dairy-free food regimen. I must admit that I'm thankful that my family does not have any food restrictions which allows me the freedom to choose almost any kind of ingredient (only real food ingredients). Quality and source matter!!

Today's inspirational recipe hails from Simple Foody. Click on her name for the full recipe. As always, I put my personal spin on the recipe. The reason for my modification today was I didn't have all the ingredients so I subbed hence creating my own version.

I made these muffins the same night I made the grain-free meatloaf as seen here. As soon as my husband came through the door from work he commented, "What ya cookin' good lookin'?" I smiled and said, "Something new!" 

Tuesday, October 14, 2014

What?! More fish? YES!!

From my first post in October, I addressed the common complaint I hear among clients (and friends) is that they want to eat fish but they don't know how to prepare it so I shared a recipe for cod with veggies! Today I'm sharing a quick post on a salmon recipe. Later in the month, I hope to share a collection of fish recipes from real food bloggers. Stay tuned! 


This recipe is gluten-free but not dairy-free because I used butter and parmesan cheese but you can sub out butter for a vegan (non-GMO spread) and omit the cheese. There is also dairy in the Lundberg Risotto (but it is gluten-free) so opt for a jasmine rice if you're avoiding dairy as well. 

You'll need 1/2 to 1 stick of butter depending on how much fish and asparagus you have. I used 1/2 stick for the amount of fish in my recipe. Use more or less (to your liking). 

Ingredients:
6-8 ounces wild caught salmon 
1/2 stick softened butter 
2 cloves garlic mashed (or 2 tsp of minced garlic)
1 tbs fresh parsley
Slices of lemon for cooking and garnish
1/2 pound asparagus 
Risotto (or rice of your choice). 
salt to taste 
Optional: Top cooked asparagus with Parmesan cheese.

Preparation:
1. Preheat oven to 375*. 

2. While oven is warming up, make risotto according to package instructions. 

3. Wash asparagus and trim to 1" pieces and discard fibrous ends (or compost!).

4. Prepare butter mixture for fish (and asparagus). A half stick of butter is enough for 6-8 ounces of fish (or 2-3 filets). Mix the garlic, parsley, and optional salt to taste with the butter. If the butter is too soft after mixing, put it in the freezer for a few minutes to let it harden (just a bit) so that it will cook on top of the fish.

5. Salt the fish (just a sprinkle). Then spread a dollop of the butter mixture on top; it should be a thick coating on top of the fish. Add a slice of lemon to each fish filet and cover.

6. In a separate bowl, toss the asparagus with the remaining butter mixture and sprinkle some salt. Cook uncovered. 

7. Cook the fish and asparagus for 17-22 minutes. Fish will flake with a fork and asparagus will be al dente. Toss the asparagus half way through. 

8. Watch your risotto while the fish and asparagus are cooking. You want everything to be done about the same time. =)

9. Optional: Sprinkle the finished asparagus with Parmesan cheese. Add a lemon garnish to each fish filet before serving. 

9. Buon Appetito!! =) 

Choose, eat, and live well! =)

Print This Post

Friday, April 4, 2014

Taste Test: Carrot Walnut Muffins

Nope, this is not fruit cake. 


Wouldn't you agree that it is extreme joy making a recipe for the first time and your family raves for it!?! This is what happened when I made the Gluten-free, Sugarless Carrot Walnut Banana Muffins from This Original Organic Life. I'm going to share the few minor changes I made to the recipe.


Rachel from This Original Organic Life had mentioned that the recipe is sugarless because no sugar was added. The sweetness comes from the fruits only. I used the almond flour for my base and used two bananas (instead of 3) and 1/3 cup coconut oil (instead of 1/4 cup). I also used tri-color carrots for added color, depth, and taste. I also added raisins and cranberries with the chopped walnuts. My husband had the nerve to ask if this was fruit cake. As if! When I shared what was in it - he said 'fruit cake.' I said, no it's carrot-walnut muffins with ... then proceeded to list the ingredients. Even though he considered it as such, he still had several minis. =)


The recipe made 36 miniature muffins. Though it's probably not a good idea, I did eat some of the raw batter before baking and it was good and had a nice naturally sweetened taste. I was surprised of how yummy these muffins were after baking and was stoked that my 5 year old asked for more after eating 4 minis. I had some for breakfast the next day. YUM-O! 

You have to try this recipe. It is so good! Rachel of This Original Organic Life shares some ingredient substitutions on her blog. Now that I've peaked your interest (again), be sure to visit her blog post for further inspiration! 

Choose, eat, and live well! =) 

Monday, March 17, 2014

Crustless Veggie Quiche (with Sausage)

As a certified L.E.A.N. health coach who stands behind the guidance taught by the Sears Wellness Institute, it is my honor to share the Traffic Light Eating concept with you via my many recipe posts. I use it daily and it is the foundation to embracing an easier way to understanding real foods, per our opinion and the guidance of Dr. Bill Sears. 


Today, I'm sharing my Crustless Veggie Quiche (with pork sausage) recipe. Yes, it's not 100% veggie because of the added pork sausage but you can omit and it'll taste fine but I'd recommend you double up on some of the other vegetables to give it a good filling. 

Other than the sausage (which is generally a red light food), the quiche is mostly green and yellow light. [Pork] Sausage is considered red light because conventional pigs eat some pretty gross stuff (and you are what you eat eats). The Jimmy Dean pork sausage (as seen below) is free of MSG and nitrites so I made a compromise. The sausage does not taste as salty and fatty as his other sausages but it's because there are no added preservatives or artificial ingredients. 


The quiche turned out yummy. I made two dishes - one with mozzarella cheese and the other without. With all my savory dishes, I add as many vegetables as possible. I want to encourage you to not be afraid of the [real] rainbow and make the vegetables front and center; do not hide or disguise them. I encourage you to make it a regular occurrence that at every meal, fruits and vegetables (more than 1) are offered. 

Vibrant colors from 4 vegetables! 
Ingredients:
2 tsp olive oil
1 sweet potato, peeled & chopped into similar sized pieces
1/2 sweet onion, diced 
1 red bell pepper, chopped
1 zucchini, diced
1 package of Jimmy Dean (All Natural / No MSG added) sausage (optional)
1-2 tsp of oregano
1 tsp salt
1/4 tsp coconut oil / olive oil to coat pans for baking
10 eggs + 1/2 cup milk, *divided 
1/4 cup of shredded mozzarella (optional)

Veggies & Sausage topped with 6 of the eggs. No cheese.

Veggies &Sausage topped with 4 eggs; optional: 1/4 cup of Mozzarella.

Preparation:
1. Preheat oven to 375*. 
2. While veggies are being chopped / diced, heat olive oil in skillet on medium heat. Add first the chopped sweet potatoes. While potatoes are cooking, dice the onion.
3. Allow the sweet potatoes to cook for about 8-10 minutes before adding the onions to brown. Once onions start to turn golden and are fragrant, add the chopped bell pepper. Allow all 3 to cook together for about 5 minutes. 
4. While veggies are cooking, coat pans (I used Corning Ware dishes) with oil of your choice. 
5. In a separate bowl, beat 10 eggs and 1/2 cup milk. Set aside.
6. Add the zucchini to the skillet, stir and cook for about 4 minutes. **When vegetables are nearly done, push them to the outer edge of the skillet, and brown the sausage in the center. Season with the oregano and salt. 
7. When vegetables and sausage are done, you'll spoon them into an even layer in your bake ware of choice. 
8. Divide the eggs & milk pouring it over the sausage-vegetable mixture. Top with cheese, if you'd like. 
9. Bake at 375* uncovered for about 35 minutes. Remove and let cool for 15 minutes before digging in! 

Buon Appetito! 

Baked, no cheese. 

Baked with mozzarella. 

Notes:
*The egg mixture is divided if you're using small bake ware. I had two different sized corning ware dishes, so I ended up using 6 eggs in one and 4 in the other. If you've got a large enough dish, you won't need to divide it. 
**You can remove the vegetables when they're done cooking and brown the sausage separately or you can cook them simultaneously in two different skillets. This will allow you to drain the small amount of fat from the sausage. I chose to leave the fat in with the vegetables for added flavor.
Lastly, I recommend you waiting until the quiche is nearly baked before adding the mozzarella. The quiche with the mozzarella almost burned before it was done baking. So, if you add the cheese, add it in the last 10 minutes of baking.

Choose, eat, and live well! =)


Monday, March 10, 2014

Not Your Mama's Shortcake!

Not Your Mama's Shortcake! 


But, I bet they're both 100% from scratch, right?! Are you ready for a nutrient dense dessert? You may just ask for more! This post was inspired by my Complete Breakfast in a Muffin recipe as seen here. The ingredients are almost exactly the same except I used vanilla Complete and added a strawberry reduction and whipped cream. 

This recipe is gluten free (not grain free) and you can make coconut milk whip in lieu of heavy cream making this shortcake dairy-free too!


Ingredients for Shortcake:
2 tbs of ground flax seeds
2 tbs of vanilla Complete (like this)
1 T applesauce
1 egg
1 tsp baking powder
1/2 tsp cinnamon 
1 tsp coconut oil + 1/4 tsp to coat the bowl for non-stick
1.5 tsp coconut sugar 
1/4 tsp raw honey 
large coffee mug

Preparation:

1. Grease the bowl with the 1/4 tsp of coconut oil (you can use a paper towel to coat or your clean fingertips). 
2. Add all the ingredients to the mug in the order above. Mix well with a spoon.
3. Cook on regular temperature for 2 minutes (this is based on a 1,000 watt microwave). You will know it's done when the top is springy and not sticky.

It'll look like this when it's done. It kind of reminds me of the texture and bounciness of sponge cake. 


Since the shortcake takes so very little time, you might make your whipped cream and strawberry reduction ahead of time. 

Ingredients for strawberry reduction:
10-12 medium strawberries + 3 sliced to garnish
2 tbs water

Preparation:
1. Heat the strawberries with the water in a pot for about 10 minutes on medium. Using an immersion blender you'll blend the strawberries for a minute - just until the whole strawberries are broken down a bit. You can also use a potato masher. 
2. Slice the extra strawberries for garnish. (I didn't have any fresh on hand. During the non-season, I buy organic and then freeze them to use for later.) 
3. While the strawberry reduction is cooling, make your whipped cream. 


Ingredients for whipped cream:
1 cup of heavy cream
1 tbs cane sugar
1/2 tsp real vanilla 
Optional: Pinch of sprinkles (I recommend Let's Do Organic)

Preparation:
1. The best way to make whipped cream is in your mixer with a very cold bowl. Put the bowl and whisk in the freezer for at least 20 minutes. 
2. Add all of the ingredients to the cold bowl and mix on high for 2 minutes. If you over mix, it'll be a lumpy not so creamy texture. 


Choose, eat, and live well! =)

Another strawberry favorite recipe you may like:
Strawberry Pizza

Friday, March 7, 2014

Taco Soup GF with DF options


I wanted to share a quick recipe to my taco soup I made recently though after it was done, it was more of a chili because it was thick. 

Note: I'm not a trained chef. I just cook from the heart, so my measurements are not spot on. I just 'eye' them and I always add where I need more flavor and I encourage you to do the same!

This one is made in the crock pot. 
I like my rice cooker for fail-safe perfect rice.

40 minutes prep (includes before and after prep time), 3-4 hours cook time

Ingredients:
1 - 15 oz of diced tomatoes
1 - 15 oz of tomato sauce
1 medium yellow onion diced, cooked 'til translucent
4 tsp cumin
2 tsp cayenne
2 tsp garlic powder
1 tsp red pepper flakes
1/2 cup diced green onions 
2 cups of vegetable stock (like here)
4-8 chicken breasts, diced and cooked
2 zucchini, diced and cooked
1 red bell pepper, diced and cooked
1 can of black beans, rinsed
2 cups of cooked rice (we like Jasmine)

Preparation:
1. Pour the diced tomatoes and tomato sauce in the crock pot on low heat. Add spices and give it a good stir.
2. While tomato products and spices are heating up, cook diced chicken breasts, onions and other vegetables for about 10 minutes (or until chicken is cooked through). 
3. While chicken and veggies are cooking, make your rice. This takes about 20 minutes. 
4. While chicken/veggies/rice is cooking, rinse your black beans and pour into the tomato products in the crock pot. 
5. Add the cooked chicken and vegetables to the crock pot. Add the 2 cups of vegetable stock. Stir.
6. Test the sauce for flavor. Add more seasonings as you deem fit. Top with diced green onions.
7. Allow the tomato products, chicken, seasonings, and vegetables to cook in the crock pot on high heat for about an hour. Be sure to stir occasionally to prevent scorching of rice at the bottom.
8. Add the rice, stir and turn on low. Cook for up to three more hours. 
9. Turn off crock pot and prepare fixings. 

Fixings:
Crushed organic tortilla chips
Plain Greek Fage yogurt
Shredded cheese
Sliced avocado

What kinds of fixings could you add that would make this recipe dairy-free?

Other recipes you may like to make in your crock pot:
Slow cooker acorn squash chili
Slow cooker butternut squash stew


Choose, eat, and live well! =)

Friday, February 28, 2014

Quinoa Stuffed Stripetti

Want a filling and nutrient dense dinner idea? Try stuffed stripetti! 

It's vegetarian and gluten-free. You can omit dairy. 


Not knowing what to do with my stripetti squash, I considered my background in culinary acts of goodness. Yeah, I'm a 'wing-it' kind of chef! I was more than pleased with the outcome of this dish! 

A stripetti's appearance resembles a watermelon but its texture is similar to that of a spaghetti squash and its flavor closer to sweet potatoes. Sounds intriguing, yes? YES!!

After doing some research on how to prepare, I learned the best way was to bake it on 375* for 45 minutes in its wholeness - not cutting, piercing or anything. Just put it in a dish with a little bit of water and roast. It's a bit tough to work with if you avoid this necessary step. 

While your stripetti is roasting, let's prepare the filling. I used no animal protein in this recipe. Instead I used quinoa. More info about this fabulous grain here

Ingredients/Preparation:

1) Quinoa cooked in your own vegetable stock (as seen here) + 1 tsp cumin + 1/4 tsp cayenne; mix and cook covered (follow directions on package). 

2) Zucchini (any green vegetable you'd like!) in a quick stir-saute with 2 T EVOO, 1/2 tsp minced garlic, and 1/2 tsp basil.

3) 8 oz of spaghetti or tomato sauce (or yours done here).

4) 8 oz diced tomatoes (choose fresh) marinated in 1/4 tsp EVOO, 1/2 tsp basil, and 1/8 tsp sea salt. 

5) Mozzarella cheese (optional). 


When stripetti is done roasting, wait for it to cool slightly then cut it lengthwise. Remove seeds with a spoon. 

Spoon cooked quinoa into the stripetti. Top with tomato sauce, zucchini, a sprinkle of mozzarella cheese, and diced tomatoes. Carefully cut it in half. Serve! (You won't be eating the skin - it is kind of dense. If you roasted it long enough, it'll peel off easily.)

This recipe packs flavor. I'm glad I had my own tomato sauce on hand because I believe it gave it a step up in deliciousness! Experiment with different vegetables - add more! Some options: Broccoli, Purple Cauliflower, Spinach! Have fun with it!

Buon Appetito!! 

Choose, eat, and live well! =)


Other varieties of squash recipes can be found here:


Monday, February 24, 2014

DIY Tomato Sauce

Got Tomatoes? Make Tomato Sauce, of course! 


I've wanted to make my own tomato sauce for a minute now. Now that I have made my very first test batch, I can be sure to replicate this recipe (doubling, tripling, etc) for the next time I get an abundance of tomatoes. Though the flavor profile was spot on, it was a bit loose and I know it's because of the lack of tomatoes I had on hand. 

I've seen similar recipes online that used canned tomatoes. You can do this in a pinch but I recommend fresh (and organic) whenever possible. 

This recipe yields about 14 oz of tomato sauce. You'll need a scale to weigh your diced tomatoes. You can gently boil the tomatoes so the skins can be removed. 

Ingredients:
14 oz of diced tomatoes (*fresh when possible; use your scale)
* You'll need up to 1/4 cup of water since you're not using canned tomatoes.
1 clove of garlic finely chopped
3 T EVOO 
1/2 cup diced bell pepper (I like yellow or orange best plus it adds some color.) 
1/2 T oregano
1/2 T basil
1/2 tsp salt 
1/4 tsp sugar (raw or organic)

Preparation: 
1. Dice 4 large tomatoes preserving as much of their juices as possible.
2. Dice bell pepper and garlic. 
3. In a pot, heat EVOO on medium and add garlic, oregano, and basil. Cook until aromatic or about 3 minutes. 
4. Add bell pepper and cook for another 3 minutes. 
5. Add tomatoes with the reserved juices and stir to incorporate the flavors of the ingredients and cook on low heat for 30 minutes, stirring occasionally. 
6. When sauce is nearly done, add the sugar and salt. Stir.
7. If you find that your sauce is too chunky, you can add in up to 1/4 cup of water. 


You can serve it two ways: 
1) chunky (which would be superb over bread for bruschetta) or
2) smooth (using an immersion blender which I did for this recipe).


Choose, eat, and live well! =)

Monday, February 17, 2014

Complete Breakfast in a Muffin


I get it! Microwaves are not the best idea for cooking a meal but let's face it, most Americans do use one almost daily! And, I'd rather see a family preparing real ingredients from scratch in a microwave then to see them heat up a frozen dinner. We all start somewhere. 

Today's recipe is an update from my post from over a year ago, entitled, Let's Take the Monotony Out of Breakfast. I made it slightly different this time around as I'm preparing for a collaborative event with a Tupperware representative and I'll be sharing the benefits of eating Juice Plus+. We're going to focus on making healthy meals and snacks for families on the go and several stations will be set up as she and I demo plant based nutrition in her serving pieces. 

Onward to the recipe!


Ingredients:
2 tbs of ground flax
2 tbs of chocolate Complete (like this)
1 T applesauce
1 egg
1 tsp baking powder
1/2 tsp cinnamon 
1 tsp coconut oil
1.5 tsp coconut sugar 
1/4 tsp raw honey

Makes 1 Complete Breakfast in a Muffin but it can serve two! 


Preparation: 
Add ingredients in the order above to a coffee mug or similar microwave-safe cup. Mix thoroughly and cook in your microwave for 1 minute to 1 minute and 20 seconds. Let it sit for 2 minutes. It will still be hot so be careful.


Top with crushed nuts of your choice. Enjoy!


Choose, eat, and live well! =)

Monday, January 27, 2014

Slow Cooker Acorn Squash Stew

Acorn Squash Stew in the Slow Cooker


I shared this recipe first via my January 2014 newsletter. I didn't take pictures at each step in this recipe because I wasn't thinking about my blog - it was during the latter part of the holidays and I had taken a break from writing / publishing. So, here I am writing for my blog. I hope you like the recipe as much as my family of 3 enjoyed eating the stew.

Ingredients:
1 pound of ground turkey (or omit)
1 acorn squash (see prep tip below) cut into chunks
1 can of chickpeas (I used one but wanted more, so 2 cans)
3 cups of DIY vegetable stock (recipe here)
2 large tomatoes, diced
14 oz tomato sauce 
1 cup of grated carrots (about 2 large carrots)
1/2 cup of grated daikon radish (can omit) + 1 cup chopped
1/2 cup of diced onions
2 tsp minced garlic
1 T EVOO (extra virgin olive oil)
1-2 tsp sea salt
1 tsp black pepper
3 tsp cumin, divided
1 tsp cinnamon
1/2 tsp red pepper flakes (can do more if you like heat)

Tools: Pot, Skillet and 6 qt Crock Pot

Prep time: 30 minutes
Cook time: 6 hours

Preparation: 

I. Acorn squash - Cut in half with chef's knife. Scoop out seeds. Boil water in a pot and put the halves in for about 5 minutes. Safely remove and let cool. Peel the skin with a sturdy Y peeler. Cut into chunks. (Boiling the halves helps soften the skin so it's easier to peel.)

II. Ground Turkey - Cook the 1/2 cup of diced onions and the 2 tsp minced garlic in the 1 T of EVOO in the skillet until golden brown. Add the ground turkey and 1 tsp sea salt, 1 tsp cumin, and the 1/2 tsp red pepper flakes. Cook thoroughly. (Does not need to be drained.)

III. Stew - Turn crock pot on low heat and pour in the 14 oz of tomato sauce, the diced tomatoes and shredded carrots, and if using, diced and chopped daikon radish. Season it with the 1 tsp cinnamon, 1 tsp cumin and 1 tsp black pepper. 

Add the acorn squash. When the ground turkey with onions and garlic is cooked, add to the crock pot. Give it a good stir and season it with the rest of the cumin and sea salt. 

Cover and cook on low for 5 and a half hours. Stir every hour or so. 

IV. Add chickpeas (aka garbanzo beans). Rinse thoroughly then add to the crock pot in the last half hour of cooking. Cover. 

Notes: If you omit ground turkey, you will want more chickpeas (2-3 cans). Omitting the ground turkey, will make this stew 100% vegetarian. Chickpeas are a good source of maganese, folate, and fiber. Their protein source is low but they're great for steadying blood sugar and aiding in digestion. 

The hints of cinnamon among with the savory ingredients gives it a slight Moroccan or Indian cuisine flare. You can add more spice if desired. Just balance it out with the cinnamon. It is easy to go overboard with the cinnamon so just increase 1/4 tsp at a time. 

You can serve this stew alone, with jasmine rice, or bread. 

As a mom to a 5 year old, it's important for me to provide nourishment through food for his growing body - which I'm sure most of you can relate to. It's also satisfying when he sits through an entire meal without complaint or asking if he can eat only a few more bites. He ate his serving (the size of his balled up fist) and then a little more along with some bread. My husband had two servings and was happy to see how much I made so that we'd have leftovers for a few days. Learn more about the portion control via the L.E.A.N. way here

I must share this tidbit before I sign off. My husband asked, "What kind of potatoes did you use?" I said, "I didn't use any potatoes. It was acorn squash." He said, "It tasted just like potatoes!" 

Choose, eat, and live well! =) 


Friday, January 24, 2014

Garbanzo Bean Poppers


Every Friday is 'share day' at my son's school and he can bring in an item (or a few) from home for the letter (sound) of the week. This particular week, G, was the letter and we agreed on two items that he'd bring with permission from his teacher. 

Our goal was to make our first batch of chickpea (aka garbanzo bean) poppers and serve green smoothies. His teacher agreed that these were nice ideas for share day and that she would help with bringing in half of the ingredients for the green smoothies.

My son helped me make the poppers on the evening before and then the next day, we prepared the green smoothies together in the classroom. 


Ingredients:
2 cans of garbanzo beans, rinsed and drained
1 tbs of oil of choice 
2 tsp of coconut sugar (you can use organic cane sugar) 
1 tsp of cinnamon

Directions:
1. Heat oven to 450*. Make sure the garbanzo beans are dry before roasting in the oven or you'll find that they'll burn (as a few of ours did that weren't completely dry). Lay them on a cookie sheet in a flat layer and roast for at least 30 minutes. They should brown. You may need to shake the pan a few times to ensure even roasting. 

2. When they're done browning and are somewhat crunchy, drizzle the oil of choice over the garbanzo beans and shake the pan to evenly coat. Place the coated garbanzo beans in a bowl. 

3. Mix the cinnamon with the natural sugar of choice then dust the garbanzo beans with the mixture tossing the beans in the bowl for even coating. 

4. They should be cool enough to eat now. Store in an air tight container or eat them right away!

Notes: This was my first time making these and I will be experimenting with different recipes. I'd like to recreate the poppers I had once that were made with cayenne and lime juice. Someone mentioned a rosemary and sea salt flavor. There will be two other popper recipes on my Let's Get Snacking post in February. Stay tuned (and subscribe to never miss a post)! 

Bonus: The cost to make this real food snack is nominal at best. Two cans of garbanzo beans cost about $3 and then the other ingredients you probably already have on hand. The snack will feed 3-4 people. Easy math. Less than a dollar per serving. 

Choose, eat, and live well! =)


Tuesday, January 21, 2014

Got leftover chicken? Let's make a meal in under 20 minutes!

It's been a long exhaustive day and you've got dinner to make for your family. You don't eat out and you've already had sandwiches for dinner this week, what do you make? 

If your ingredients look something like this, you can make a meal in under 20 minutes. [Be sure to save this recipe for future use.] You can use any leftover lean protein for this recipe. Using leftover lean protein is the time saver in this recipe. 


Ingredients:
Leftover (or new) jar of spaghetti sauce
Pasta (your choice)
Veggies on hand (I used onions, garlic, and zucchini.)
Fresh or dried herbs 
Heart Healthy oil (olive oil is an Omega 9)
Leftover chicken breasts 


Preparation:
1. Boil water for your pasta. 
2. Dice garlic and onions and add to a skillet on medium heat with 2 tbs of extra virgin olive oil and herbs of your choice (I used fresh basil and dried oregano). Cook onions until slightly golden brown. 
3. While onions and garlic are cooking, cut up the chicken breasts and prepare your veggies. 
4. Add chopped veggies to the onions and cook for a few minutes stirring occasionally. 
5. Pour the spaghetti sauce over the vegetables in the skillet. Stir. 


6. Add the diced cooked chicken to the sauce, stir and cover. Let marinate on low heat while pasta is boiling. 


7. Drain pasta. Plate it and if you like, top with some butter (we do). 
8. Top with chunky sauce. 


9. Buon appetito! 

Choose, eat, and live well! =)

Friday, January 17, 2014

How to Make Chili Like a Boss

Southwestern Butternut Squash Chili

Vegetarian, gluten and dairy free options

You can find the full recipe over at Conveying Awareness blog. Thank you for dropping by! 


Choose, eat, and live well! =)

Updated January 2023.


Friday, January 10, 2014

Spinach Pesto Balls

Who loves green veggies? 


Spinach Pesto Balls

This recipe has been moved to my new blog. You can find it on Conveying Awareness. 


Choose, eat, and live well! 

Sunday, December 8, 2013

How to make a grain-free meatloaf

Grain-free Meatloaf Dinner 


I follow some awesome food blogs. Most of the time I'm pinning and sharing their resources in the hopes of making some of them for my family. This day I pinned, shared, and cooked! 

It was my first time making a grain-free meatloaf. I don't follow any diets or styles of eating like Paleo, WAPF, and the likes, but I do enjoy experimenting in the kitchen. 

For my meatloaves, I typically use plain Panko bread crumbs and add my own spices to it. I've noticed the last few times though a slight inflammation after consuming it with grains. So, why not try something different! I must say that I didn't experience the bloating afterwards. The best though was my family's enjoyment of the dish. I was about to write - entire dish, but I recall that my son is not a fan of green beans. I know, I know, most kids like green beans and corn but my son is different - he likes squash and other veggies most kids don't take to very well. He doesn't like corn either. 

The recipe for the meatloaf is from Life Made Full. I made some modifications because that's just what I do. Below is the recipe that includes my changes and the rest of the ingredients for the two sides - roasted green beans and mashed potatoes. Click on the title below for her full recipe.


1 pound of ground beef
1/3 cup of almond flour
1 egg
1 medium onion, 1/2 diced, 1/2 chopped
1/2 tsp minced garlic + 1/2 tsp 
1 T mustard
1/4 T cayenne
1/4 T tumeric
1/2 T garlic salt
1 T organic ketchup
3 T almond - coconut milk (I used Califia Farms brand.) + 1 T (a splash)
1/4 cup EVOO + 1 T
1 tsp dried oregano
3 T butter

Brown the diced onions with garlic in 1 T EVOO in a pot (not skillet) on medium low heat. You'll be using this same pot for the rest of the meal. This takes about 10 minutes. 

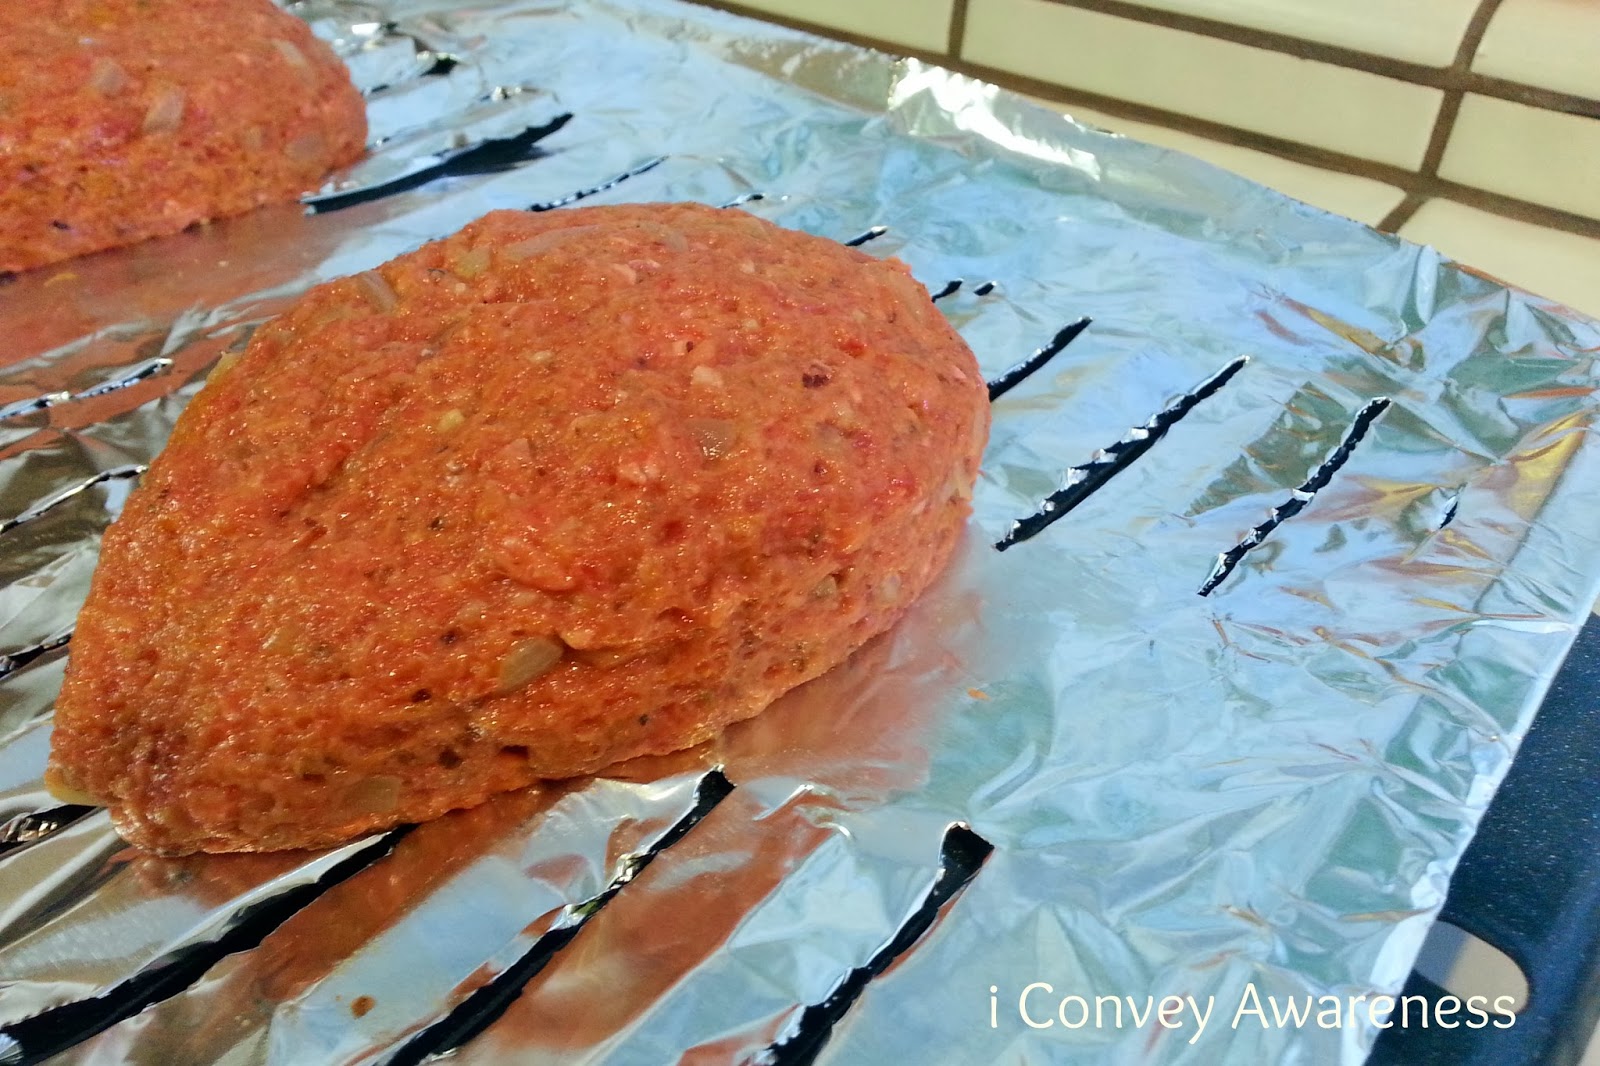
Preheat oven to 350 degrees and line a broiler pan with foil. 


In a bowl, combine all ingredients incorporating onions and garlic last. Shape loaves with your hands and bake for 40 minutes. Internal temp must reach 160. 


While the meatloaf is baking, you'll be preparing your green beans and mashed potatoes. Cut off the ends as shown above. You will add spring water to the pan that you cooked the onions and garlic in. 


When water comes to a boil, add the green beans in carefully and blanch them for 3 minutes. Drain the beans saving the water from the pot. You'll need this again for the mashed potatoes. Note: Using the same pan for an entire meal helps develop flavors so that each dish has a hint or two of the other items on the plate.


While waiting for the water to boil, make a marinade for the green beans. You'll need 1/4 cup EVOO, the chopped onions, 1/2 tsp minced garlic and 1 tsp dried oregano. 


When beans have been drained, coat them with the marinade. Roast in the oven at 350 for 20 minutes. Don't rinse the bowl. You'll use this for your potatoes. 


While the meatloaf is baking and the green beans are roasting, boil the water from the drained green beans (may need to add more spring water as necessary). Wash, peel, and cut the potatoes and boil them until the right texture - about 10 minutes. Drain the potatoes and toss them in the bowl from the marinade. (No image.) Mash potatoes with 3 T butter and a splash of the almond-coconut milk. Add S&P as necessary. 

Your dinner will be done from start to finish in about 60 minutes. If you have a double oven, it helps with completion. If not, no worries - you're baking the meatloaf and roasting the green beans at the same temperature. 

Choose, eat, and live well! =)

Be sure to follow Life Made Full on Facebook