Monday, June 30, 2014

Guest Post: Move More, Drink More!

Join me in welcoming Andrea Cordes, owner of Formation Power Fitness, in her sharing of the importance of movement and hydration which ties directly into my awareness challenge for July! As you may know, every month for the first ten days I offer a challenge to support our wellness journey. In months past, we've done ACV shots, oil pulling, juicing, and being kind (to self, the planet, and each other), and more! 

For the month of July, I have asked Andrea to share 10 different fitness challenges that I believe we all can freely incorporate; however, you're always encouraged to modify as necessary. If you're stumbling upon this article after the Facebook event is over, why not leave a comment with your commitment to adding more movement over the next ten days while hydrating yourself with water. 


Move More, Drink More!

Water, that is. Drink more water. And while you're at it, go ahead and add some more movement to your day.

Here's the thing being active and fit: At the end of the day, the purpose of any kind of exercise is to IMPROVE YOUR ACTIVITIES OF DAILY LIFE. The reason we work out, lift weights and run is because doing so conditions our bodies to be more adept at the challenges we face each and every day.

What I want to impart to you is the following:
+ You do NOT have to go to the gym to work out.
+ You do NOT have to block out an hour for a workout.
+ You do NOT have to jump on with the latest fitness craze in order to improve yourself.

Here's the secret: Every. Movement. Matters.


Little changes DO add up to big results. I want you to realize, you do NOT have to spend hours at the gym to improve yourself. I understand many of us don't even want to go to the gym, we feel like we have to get into some kind of good shape before we are even good enough to walk into the gym. I'm going to share with you some very easy ways to integrate more movement into your day.

Train For Movement: 


Next, I want us to think about training our bodies for movement, not muscle. If you train for MOVEMENT, muscle will naturally follow. What happens when you get this backwards? A perfect example is those big time body builders. Sure, they can push around a ridiculous amount of weight, but have you ever watched them do an everyday task?! They can barely walk! They are stiff and swollen and their huge muscles do them no good.

Train in such a way that your body will more easily accomplish the tasks you face every day; such as heaving that 20 pound bag of dog food into the shopping cart, without throwing out your back. Or being able to squat down IN APPROPRIATE FORM to pick up the toy car that has been dropped AGAIN...!

You can accomplish everything needed for an improved quality of life, all without ever joining a gym. It's so overstated that no one pays it any mind anymore, but adding small, extra movements into your day will make a difference. I promise.

Daily Challenges: 


I have partnered with Conveying Awareness in offering simple challenges to put more movement into your day. I am good at the fitness side of things; Jessica is good at the nutrition side of things. She invited me to link arms with her, and together we provide a very well rounded approach to wellness. So, for Jessica's Water & Movement challenge in July [1-10], I encourage you to embrace each daily challenge. Let’s begin! 

Day 1 - Hydration Basics!

Let's start with the basics. Are you getting enough water?! The baseline is eight, 8 oz glasses. Every day. Here's a great visual prompt to see if you're getting enough water. Take 8 jelly bracelets and start the day with all 8 of them on your left wrist. Every time you drink a serving of water, take one bracelet off the left and place it on your *right* wrist. Because you just did the right thing. It's such a great way to SEE and measure how you're doing. Try it!!


Also think about finding a local Tabata Bootcamp Trainer for an incredible 8 week fitness program! 


Day 2 - Push Ups!

Microwave push-ups. Every time you are waiting for food to cook, it's an opportunity for extra movement. Go ahead and knock out some push-ups while you wait. By doing them off an incline like the kitchen counter, you are able to use full range of motion. Come on down, all the way. Let your chest touch the edge of the counter. Exhale as you push up for a little extra umphh. Your shoulders need to be lined up right over your hands and brace your core to keep your whole body in a nice, straight line. 


Day 3 - Take the Long Way!

Park as far as you can! At the supermarket. At work. When you're going shopping. Park your car as far as you possibly can from that entrance! Those extra steps will make a difference. 

Day 4 - Do Something New!

Wahoo! Independence Day! Today, do something new. Try a new movement. Never held a plank before?! Look it up and give it a try. Or maybe you've always wanted to try out a yoga class. Go find one! I recently challenged myself with a mud and obstacle run put on by the US Marine Corps. But if swimming through mud isn't your idea of a great challenge, fear not! There is so much out there to try. And the payoff for this one is both physical and mental. The feeling of accomplishment, of having conquered! Go conquer!! 


Day 5 - Set Your Time!

Let's set up our phones for an alarm every hour. When that alarm goes off, do SOMETHING for 20 seconds. It's only 20 seconds. Do whatever makes you feel good. Squat, jumping jacks, run up the stairs. Have a dance party in your living room. Just MOVE!! It makes a difference! This is also a great way to demonstrate to our families the importance of physical activity. Get the kids in on it, too!


Day 6 - Stretchhhhhh! 

What kind of flexibility do you have? This is an important counter-balance to muscle strength. Chronically tight muscles can lead to improper posture and movement, again leaving us susceptible to injury. Stretching is a vital part of any exercise regimen. The proper time to stretch for FLEXIBILITY is AFTER some kind of exercise. (Pre-exercise stretching should be very light and for the purpose of loosening up to prevent injury.) Post exercise your muscles are warmed up, therefore stretches should be deeper and held for a minimum of 20-30 seconds. 
Avoid "ballistic" stretching (bouncing out of and back into the stretch) and do NOT push the stretch so deeply that it is painful or uncomfortable. Ease into it slowly and don't force anything. Flexibility takes time, just like strength. 

Bonus- 

How's that water challenge going?! Let's revisit this one because it is so crucial. Your body needs water. Be mindful about hydrating again today. 

Day 7 - Posture Awareness

Time to talk about posture. Did you know, if you catch yourself in a cowering or less-than-confident physical posture, that your mind actually takes cues and follows suit?! Stand tall! Be confident! Shoulders back, chest up! Today I want you to be very conscious of how you carry yourself. It's subtle, but it has a huge impact on your mindset and well-being.
Oh, and consistently poor posture will lead to changes in your muscles which then reinforces that bad posture. Break the chain!

Day 8 - Take 2!

Start your day on a positive note. Take 2 minutes to move before you jump into the rest of your day. 20 seconds of work, 10 seconds rest and then do it again. By starting your day with movement, you jump-start your metabolism. Oxygenate your blood. Kick start the day with a very positive, affirmative tone. Want to amp-it-up a bit? Pick a short phrase or intention to repeat to yourself as you do the 20 second work-intervals. Good for the body, good for the soul. If you do nothing else today, you can still feel good and feel accomplished that you have done SOMETHING. Because something truly is better than nothing. I promise. 
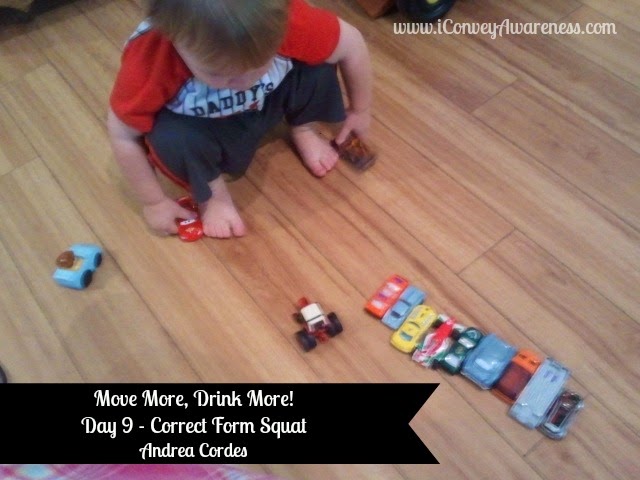
Day 9 - Squat

Have you ever thought about the distinction between a full squat and a "Western squat?" When you squat down, to pick something up for example, what do your feet do? If you pay attention you will notice your heels automatically raise. Now think about how a toddler squats...they drop right down, heels planted and hang out in that position like it's no big deal. This is a prime example of use-or-lose. We are born with the flexibility to keep our heels grounded, but over time we lose it. A big culprit is that we wear sneakers with elevated heels. And that we don't think about it. So today, think about keeping your heels pressed to the floor as you squat down. You may have to start with a wide stance, but stay with it. I've been working at this for the last 6 months, and only now have I been able to drop into that toddler squat comfortably. Learn more here 


Day 10 - Be Creative! 

Your turn!! What are some creative ways to add more movement into the course of your day?! Find a challenge that works for you and PLEASE, share with the rest of us!! The whole point is finding something you enjoy doing and are likely to KEEP doing. I want to hear what you come up with, and all the readers can benefit from it too. We are all in this together, this thing called life. What can you offer, uniquely you, to the rest of us? To help us better ourselves!


Fitness is an attitude. It's a way of life, a mindset. It's not just going to the gym for an hour and then forgetting about it. You need to eat, sleep, breathe a fitness attitude. So, start wherever you are, use whatever you have, DO what you can. And be PROUD :)

Last words, to stay up to date on the next awareness challenges, be sure to *like* Jessica David's page and *like* Andrea Cordes' page as well! 

Jaysen Kim of Studio Icon, LA
Andrea Cordes grew up in Cincinnati, OH and graduated the University of Cincinnati in 2002 with a Bachelor degree in Psychology. Upon graduation, she also commissioned into the U.S. Air Force as a Second Lieutenant. Andrea completed Joint Undergrad Navigator Training at NAS Pensacola, FL and continued onto Seymour Johnson Air Force Base, NC for the F-15E Formal Training Unit (FTU).

In February of 2005, Andrea achieved "mission ready" status as a Weapons System Operator in the F-15E Strike Eagle. Training now complete, Andrea was assigned to the 336th Operational Squadron. During her time with the 336th, Andrea deployed in support of Operation Iraqi Freedom. After a short assignment in the Wing Plans Office and then as an assistant to the Wing Commander, Andrea was asked to return to the FTU squadron as an instructor. 

Andrea completed her service obligation and discharged honorably in 2010. Not one to sit idle, Andrea quickly found her niche in the fitness industry. Andrea achieved her Group Fitness Certification from both American Council of Exercise and the Aerobic and Fitness Association of America, and became an instant favorite for teaching aerobic classes at the Beaufort YMCA. Andrea next got certified in the trademarked program Tabata Bootcamp. The creator of Tabata Bootcamp, Mindy Mylrea, asked Andrea to join her team of Master Trainers and Andrea is now the representative for Southern California.

Andrea currently works at In Shape health club in Ridgecrest, primarily as a Schwinn certified indoor cycling instructor. She also leads 8 week Tabata Bootcamps in addition to holding workshops to certify new Tabata Bootcamp trainers.

When Andrea got out of the Air Force in 2010, she finally joined husband Neil in Beaufort, SC after 5 years of "commuter marriage." Daughter Madeline was born in 2009 and son Alex in 2011. Husband, Neil, is still active duty USMC and the family is currently stationed in Ridgecrest, CA. 


Friday, June 27, 2014

Sustainable and Terrific Tea


Are you looking for an inexpensive and sustainable gift idea for a loved one? This may be it! I am a little proud of the way this came out and let me tell you, I'm not inherently crafty but hey, we've all got strengths, right? This gift also led me to learn more about various teas and how they're packaged and why we need to read labels on everything we consume. 

Items:
Mason Jars (aren't they one of the best inventions?!)
Leftover fabric scraps (cut into 5"x5" squares)
Organic tea (fair trade and non-bleached; loose, if you can find it)
Raw honey sticks 
String and tags 

Lesson Learned!

Loose tea may be a more sustainable choice since you won't have to worry about bleached/chlorinated bags; however, look for organic and/or fair trade. I chose this brand for the purpose of this gift. More information on why plastics, and chlorinated, pesticide ridden tea is a concern for you: here. You can also make your own tea bags (like this) by reusing organic t-shirts (or onesies) like Tracy did from Oh, The Things We'll Make. 

Let's Assemble! 

Place tea of choice in the mason jar then seal it with the lid. I'm sure you can get super crafty and use a prettier tag for the "You're Tea-riffic" and your name on the back. Grab any string that will compliment the fabric or style you're going for. I tied two honey sticks to the string (triple knotted) so they wouldn't slip out. You'll need an extra set of hands to hold the fabric in place while you tie the string with the honey sticks around the top of the jar without the fabric slipping out of place. (I had some fabric scraps left over from another project so they were cut to the 5 inch by 5 inch squares.) 

Gift Giving!

My 5 year old son had shared with me that one of his teachers uses a mason jar every day while in the classroom. He also mentioned to me that his other teacher has talked about drinking tea when she's been under the weather. The things that kids remember! 

So he presented one jar to each of his teachers at the end of the school year this past May. (He has two teachers at the Montessori school.) One of the teachers replied, "Love it! I have tea almost daily in a mason jar while at the school." His other teacher replied, "I enjoy this type of tea a lot. Great gift idea. So creative!"


This is a gift that can be reused and repurposed. Now, if I was super crafty, I would have made the fabric square into a coaster. Hey - what a great idea for you!! =)

Share with me the first time you made a craft for a loved one. What did you make, what was the occasion, and what was their reaction?

Be well!


Monday, June 23, 2014

Superbly Filling & Satisfying Stuffed Cabbage

Stuffed cabbage with store-bought sauce.


Are you contemplating making stuffed cabbage but short on time and maybe experience? Try this recipe on for size then let me know if it can be made simpler. Caveat: It must still pack nutrition in every bite and must have at least 4 different vegetables. 

Let's get started with the ingredients list first. 

Ingredients: 
1 pound of ground turkey 
1 head of green cabbage (will yield 7-8 cabbage rolls)
1/4 cup EVOO 
1/2 cup diced onions
1 clove diced garlic
1 cup shredded carrots
1 cup chopped kale
1 cup shredded zucchini
1/2 cup diced tomatoes
1 jar of organic spaghetti sauce


Dried Seasonings:
2 tsp oregano 
2 tsp basil
1 tsp turmeric 
1 tsp S&P (to taste)

Notes: When I don't make my own tomato sauce (like this), I opt for organic spaghetti sauce in a jar. I can reuse the jars and I don't have to wonder about the BPA from the lining of the cans seeping into the sauce from the acidity of the tomatoes. (I have used canned foods in a pinch, including tomatoes but I don't make a habit of it.) There are specific foods that I prefer to buy organic every time and one of them is tomatoes; however, where I reside does not always have organic tomatoes. So, because the benefits of eating produce is better than not, I ensure that the label (if packaged) does not have any unnecessary added ingredients.  

I decided at the last minute that my cabbage filling needed more vegetables so I added 1 cup of roughly chopped kale (not pictured in the raw ingredients above). 

Purchase organic extra virgin olive oil (EVOO) when possible or from a trusted supplier (organic label may not be necessary). Much of what's found in the stores (inorganic) is not 100% olive oil and may have fillers like canola oil or other inferior oils. A website I refer my clients to is California Olive Oil Council and you can find a list of suppliers around the nation who sells superior olive oils.  

Preparation:
1. Heat oven to 375*.

2. Bring water to a gentle boil in a large pot. 

3. In a skillet, add the EVOO and heat to medium. Add onions until golden brown then add garlic. 

4. Prepare the vegetables while onions are browning. 

5. Add the seasonings to the onions and garlic then add shredded carrots.

6. Slowly add the next vegetables one at a time allowing each to cook for about 3 minutes. Stir occasionally.

7. When all the vegetables have been incorporated and cooked slightly, leave them in the skillet pushing them to the outer edge when you add the ground turkey. The turkey will absorb the flavors of the vegetables while it's browning. 

8. When turkey is brown, mix the vegetables with the meat. Move to a bowl.


9. When the water comes to a gentle boil in the pot, carefully add your head of cabbage and let it simmer for about 5 minutes. 


10. Carefully remove the cabbage from the water and gently peel the layers of cabbage leaves laying them flat to dry. A medium sized head of cabbage will give you about 7-8 leaves (or 7-8 cabbage rolls). Cut out the tough core of the cabbage. 

11. When leaves are somewhat dry, add about 1/3 cup of cabbage filling to the outer edge of the cabbage and roll inward tucking in sides as you roll forward. 


12. Places stuffed cabbage rolls with seem facing down in a oven safe dish. 


13. Top cabbage rolls with spaghetti sauce. Cover and bake for 30 minutes. 


14. Buon Appetito! Enjoy your stuffed cabbage with 6 other vegetables! 

Results: 
My family enjoyed these immensely. I love that they love vegetables! I served the cabbage rolls with jasmine rice but you can choose to eat them alone. They're filling and flavorful. 

What are some ways you use green cabbage? 

Choose, eat, and live well! =)

Thursday, June 19, 2014

Everything but the Kitchen Sink Pancakes

If you can eat gluten and dairy, these pancakes have added nutritive benefits in its ingredients. Come learn more! 


This recipe is packed with nutrient dense ingredients which includes many organic components like whole wheat, buttermilk, cacao, flax, and chia. I published a version of these pancakes before and have been making them throughout the last year but some things get well, boring, and you've got to jazz them up! 

Makes 6- 3" diameter pancakes. You may need to double or triple the recipe as needed. 

Ingredients:
2 eggs
1/4 cup coconut oil (melted, if necessary, and cooled slightly)
1/4 cup coconut sugar
1 tsp vanilla
1 tsp cinnamon
3/4 tsp baking powder
1/2 tsp baking soda
1/2 cup organic whole wheat pastry flour 
1/4 cup ground flax seed
3 tbs cacao powder (optional)
1/2 cup buttermilk (see how-to in step 1 below) + 1 tbs lemon juice
2 tbs soaked chia seeds + 2 tbs of water (or you could use chia powder)


Directions:
1. In a small bowl, fill cow's milk to the 1/2 cup line and squeeze in 1 tbs of lemon juice. Let sit. (If you don't have any lemons, you can use 1 tbs distilled white vinegar.)

2. In another small bowl, add 2 tbs of chia seeds with 2 tbs of water. Let sit. You'll add this in at the end. 

3. Beat 2 eggs in a medium sized bowl. Add the melted (and cooled slightly) coconut oil (or the oil could harden (with cold eggs) but if the oil is too hot then it could cook the eggs a bit!), coconut sugar, vanilla, cinnamon, baking powder and baking soda. Mix until combined.

4. Add flour, ground flax, and optional cacao powder. Mix. The batter will be very thick and lumpy. 

5. Your buttermilk should be ready. Give it a good stir then add it to the mixture. Stir until well combined. 

6. Add soaked chia seeds (the seeds with its water (if any remains)) to the mixture and stir until well combined. If you use chia powder, add it in with the flour mixture (step 3).

7. In a skillet, melt some butter. Cook pancakes on medium-low heat. When you spoon the mixture in, give the skillet a gentle shake side to side once or twice to spread the mixture evenly. As always, when bubbles appear, it means it's time to flip. Once you flip the pancake, don't press down on it immediately. Allow a few moments to go by then give it a gentle press. The pancakes need about 2 minutes on each side to cook or you'll end up with wet middles. Eww and who wants that?! =)

8. Top with maple syrup, crushed almonds, or fruit. You can thin the batter out by using more buttermilk or water and make crepes. 

Choose, eat, and live well! =)


Monday, June 16, 2014

My go-to non-dairy shake!

This is just a quick post to share with my readers about one of my favorite go-to non-dairy shakes that packs plant protein, fiber, and is a good source of omega 3s. When it comes to my shakes, routine is perfectly fine for me. Now, when it comes to my vegetables - I must get a variety or I get bored! Plus there are so many more benefits to eating the [real] rainbow daily that it makes more sense to me mentally to get my 5 of each in daily, at a minimum.  

Dr. Bill Sears recommends that adults get in at least 25g a day in fiber and half of our body's weight in grams of protein (plant / animal) a day. With the shake I'm about to share and with my [weight] transparency, I got in almost half of my minimum protein requirement in the shake alone. Yeah, there may be other protein powders on the market that offer way more protein but I'm a big proponent of getting protein from plants when I drink a shake. I can get in the other sources, including meat or dairy, when I eat my meals throughout the day. I find that when I drink my plant based shakes, I stay satisfied and it has been especially helpful for recovery post workouts as well as it serves as a way to lessen injuries while working out. 


Now onto the recipe! If you'd like to learn more about the ingredients and / or the plant protein powder, please message me on my blog. Be (stay) well! =)

Ingredients / Tools:
10 oz of Califia Farms (Almond-Coconut milk (unsweetened - ZERO sugar);
1 banana;
2 tbs natural peanut butter;
1 tbs ground flax;
1/3 cup Complete;
2 tbs ground almonds (meal);
1 tbs unsweetened shredded coconut;
1 tbs shelled hemp seeds;
1/2 tbs Enjoy Life chocolate chips (dairy free);
1 Vitamix


This shake offers about 33g of protein and 28g of fiber. There is no whey, casein, or gluten. It makes sense for almost everyone's health regimen!

Ready to embark on the Clean Transformation Challenge with me and others?! Let's do this ... together! There is more accountability and encouragement when you link arms in your journey to wellness. 


Choose, eat, and live well! =)

Thursday, June 12, 2014

Buttery Sage Rice Noodles & Veggies


My week has been busier than normal with my son starting two different sports: gymnastics and soccer. As you may know, I like to share recipes that are easy to make because they don't require a lot of ingredients. Simplicity speaks to my heart and time! 

I had two beautiful purple eggplants sitting on my counter and sage leaves in a jar of water. I was fortunate enough to have several zucchini as well and some red potatoes that needed to be cooked. BTW, zucchini is my favorite vegetable of all time!

This dish is simple. Simple prep. Simple flavors. Simply delicious!

Ingredients:

Brown rice noodles (gluten-free)
6 red potatoes, diced 
1 large eggplant, diced
1 large zucchini, diced
2 tbs oil of your choice (I used grapeseed)
1/2 tsp sea salt
1 tsp organic adobo; divided

Sauce:
8 tbs butter (I used grassfed and it is finger licking good!)
6 sage leaves (fresh)
1 tbs lemon juice
3 tbs Parmesan cheese

Preparation:

1. Cook noodles according to package directions. This takes about 20 minutes including the time to boil the water which gives you plenty of time to prep veggies and cook them.

2. Heat skillet on medium with the 2 tbs of oil. 

3. Dice the potatoes first and add a pinch of salt. Throw them into the skillet as they will need the most cook time. Sprinkle Adobo seasoning over the potatoes. 

4. As for the eggplant, I know this is not a favorite vegetable among many and the only way I can eat them is the area without the seeds. Dice the eggplant based on your preferences and when potatoes have started to brown (takes about 10 minutes), toss the eggplant in with the potatoes. Season again with a pinch of Adobo. 

5. Dice the zucchini and toss in the skillet when eggplant has been cooking for about 5 minutes. Adjust heat as needed. Use the remaining Adobo seasoning for the zucchini and the other veggies.

6. When noodles are done, rinse them in a colander with cool water. Place in a serving bowl. Set aside. I like this brand of noodles (see link above) because they're not mushy. 

7. When vegetables are done cooking, they should not be mushy either. They should have some texture. Turn off the heat and cover. 

It's now time to make the sauce.

8. In a small skillet, melt 8 tbs of butter on medium-low heat. When butter starts to brown, add the sage leaves. Give it a gentle stir every minute or two. In about 5 minutes, remove the sage leaves and turn off the heat. Squeeze half of a lemon (or pour in the 1 tbs of prepared lemon juice) into the butter then add the Parmesan cheese. Stir and pour over the noodles. 

9. It is time to add the prepared veggies into the buttery sage noodles. Give it a good toss. Taste. Does it need more seasoning? Add as necessary. Buon Appetito!


Enjoy the dish and come back and share with me your experience. Did you use different veggies? Did you need more seasoning? If you're one of the many that isn't a fan of eggplant, I encourage you to give this recipe a try. I may just change your mind. =)

If you're not gluten-free, have you ever used rice noodles in place of whole wheat pasta? 


Choose, eat, and live well! =) 


Monday, June 9, 2014

Chicken Salad

In my last post, I shared a recipe on a DIY mayo. I thought I'd put my mayo to the test with the ultimate chicken salad as I had two grilled chicken breasts left over. This post will be short and {definitely not} sweet. I thought I'd spare you the after shots because with the added turmeric, the chicken salad came out an interesting color which was not pretty in pictures! So you'll have to use your imagination! But I can help a bit with your thoughts - I did make me a nice chicken salad sandwich with sliced tomatoes and spinach. YUM!


Ingredients:
1/4 cup lightly browned sweet onion, cooled & diced (you can use raw)
1/4 cup red bell pepper, diced
1/4 cup cucumber, diced
2 leftover cooked chicken breasts, chopped
1 tsp of Mrs. Dash salt-free / MSG-free seasoning of your choice
1/2 tsp turmeric 
1/4 tsp cayenne
3 tbs DIY mayo (recipe here)
S&P to taste 


Mix ingredients together and serve as you wish! I used cucumbers in place of celery. I also wanted added crunch since I didn't use the celery (not a fan) so I added the bell pepper. I chose to lightly brown the onions before adding them in (let them cool slightly if you do cook them). 

Buon Appetito!

Choose, eat, and live well! =) 

Friday, June 6, 2014

A Wellness Journey - My Story

Click on over at Honey Colony where I was invited to share my story and why I chose nutrition as the main focus in my life's journey. One of the things I always say to friends, clients, and prospects is that baby steps, when meaningful, can create ever lasting change in our journey to wellness. 

Join me as I share my personal struggles and where I'm at in this stage of life on the guest post, "Start Where You Are." I am delighted to encourage you in your journey to wellness. Take the first step... with me! 


Choose, eat, and live well! =)

Thursday, June 5, 2014

5 Ingredient Mayo


One of the condiments I've been trying to get away from was Kraft Mayo because I know that it is GMO. Processed foods can be made by scratch but some recipes are a bit complex and I want my readers to know that I oftentimes endorse recipes that do not require expensive ingredients or extensive culinary skills. (Sure, there are recipes that may require some investment pieces but those can be obtained when you're at that stage in your personal journey.)


When I made my first batch of mayo I had to dump it. I had read several recipes online that used ground mustard. In the image above, it shows the ground mustard but when I used my immersion blender it did not emulsify as it should have. So in my second batch, I replaced it with a dollop of dijon mustard. 

Tools:
Cuisinart Immersion blender with cup 
Measuring spoons, cup
Mason jar

Ingredients:
1 egg yolk
1 tbs lemon juice
1 dollop mustard
1 cup of light oil (I used grapeseed but *organic olive oil is best)
1/2 tsp of salt to taste (after it's been whipped, see first image).


Preparation:
In the order of the above, add the ingredients to the cup (it comes with the 2-speed immersion blender, link is in the ingredients). The most important step is to slowly pour the oil in with the other ingredients; a slow stream. Gently place the immersion blender in and turn on high. It will take about 30 seconds. You will see it emulsify (or thicken) in the cup. Remove blender. Add salt to taste, stir, and store in a glass jar in the fridge for up to 1 week. 

Note: I used grapeseed oil because it was the light oil I had on hand. I use this oil on occasion but it is an Omega 6 oil. We need to have a balance of all 3 omegas in our health regimen. I recommend organic olive oil (not EVOO) if you make this recipe and it's an Omega 9 - a better, healthier choice. However, I will use grapeseed as my Omega 6 choice as it is not GMO. It doesn't have much of a taste making it versatile. 

I used my first DIY mayo in a chicken salad recipe that I made from scratch. This recipe is here.

Choose, eat, and live well! =) 


Monday, June 2, 2014

May Montessori Wrap-Up

For May, we did a few new activities and some old faithfuls that haven't been blogged about before that I will share on this post. We are heading into the summer break and though we'll be more relaxed, we are still going to be incorporating some learning experiences into life or what we consider 'unschooling.' We will have an opportunity to be a part of a community garden that we'll be volunteering in weekly and I plan to blog about our experiences working with the soil and the vegetables and our interactions with the other volunteers. 

Egg Matching - ABCs 

This is the old faithful that we've done since last Easter (2013). The object is to match the upper case to the lower case alphabet. There is also a book that we read and identify the alphabet. This is an activity from age 3 and up. We refer to the activity for practice and it's great for sensory play too. 


Sorting, Thread & Patterns

Using Trader Joe Os cereal, my son first separated them by color then without eating too many of them he created a pattern of the colors on the pipe cleaner. He ended up making two necklaces and eating them right away! We like the Trader Joe Os for the natural colors and the ingredients. 


Cloud Dough Construction Sensory Box

Recipe: 4 cups of all-purpose flour to 1 cup of mineral oil (give or take). I added in a few drops of lavender essential oil to make it therapeutic. This is definitely an outside activity. We added some construction trucks for play time. We played together for about 1 hour in this sensory box. It was a lot of fun. The lavender kicked in and I got sleepy but my son kept playing but afterwards he was chill. This is an inexpensive and rewarding sensory play! 


Plum Picking 

It's stone fruit season and we are blessed to have a plum tree in our yard and in our neighbors' yard. Our tree is not producing as much fruit but our neighbor's tree is! So my son and I took our step ladders and picked fruit. This experience set us up for our volunteer work in the community garden starting in June. Next month or early July, the peaches, figs, and pears will be ready for harvesting. We use no pesticides on our trees. Just good eatin' here! 


What kinds of activities will you be involved in this summer break? Will you be incorporating any learning into it? Feel free to share.