Sunday, December 8, 2013

How to make a grain-free meatloaf

Grain-free Meatloaf Dinner 


I follow some awesome food blogs. Most of the time I'm pinning and sharing their resources in the hopes of making some of them for my family. This day I pinned, shared, and cooked! 

It was my first time making a grain-free meatloaf. I don't follow any diets or styles of eating like Paleo, WAPF, and the likes, but I do enjoy experimenting in the kitchen. 

For my meatloaves, I typically use plain Panko bread crumbs and add my own spices to it. I've noticed the last few times though a slight inflammation after consuming it with grains. So, why not try something different! I must say that I didn't experience the bloating afterwards. The best though was my family's enjoyment of the dish. I was about to write - entire dish, but I recall that my son is not a fan of green beans. I know, I know, most kids like green beans and corn but my son is different - he likes squash and other veggies most kids don't take to very well. He doesn't like corn either. 

The recipe for the meatloaf is from Life Made Full. I made some modifications because that's just what I do. Below is the recipe that includes my changes and the rest of the ingredients for the two sides - roasted green beans and mashed potatoes. Click on the title below for her full recipe.


1 pound of ground beef
1/3 cup of almond flour
1 egg
1 medium onion, 1/2 diced, 1/2 chopped
1/2 tsp minced garlic + 1/2 tsp 
1 T mustard
1/4 T cayenne
1/4 T tumeric
1/2 T garlic salt
1 T organic ketchup
3 T almond - coconut milk (I used Califia Farms brand.) + 1 T (a splash)
1/4 cup EVOO + 1 T
1 tsp dried oregano
3 T butter

Brown the diced onions with garlic in 1 T EVOO in a pot (not skillet) on medium low heat. You'll be using this same pot for the rest of the meal. This takes about 10 minutes. 

Preheat oven to 350 degrees and line a broiler pan with foil. 
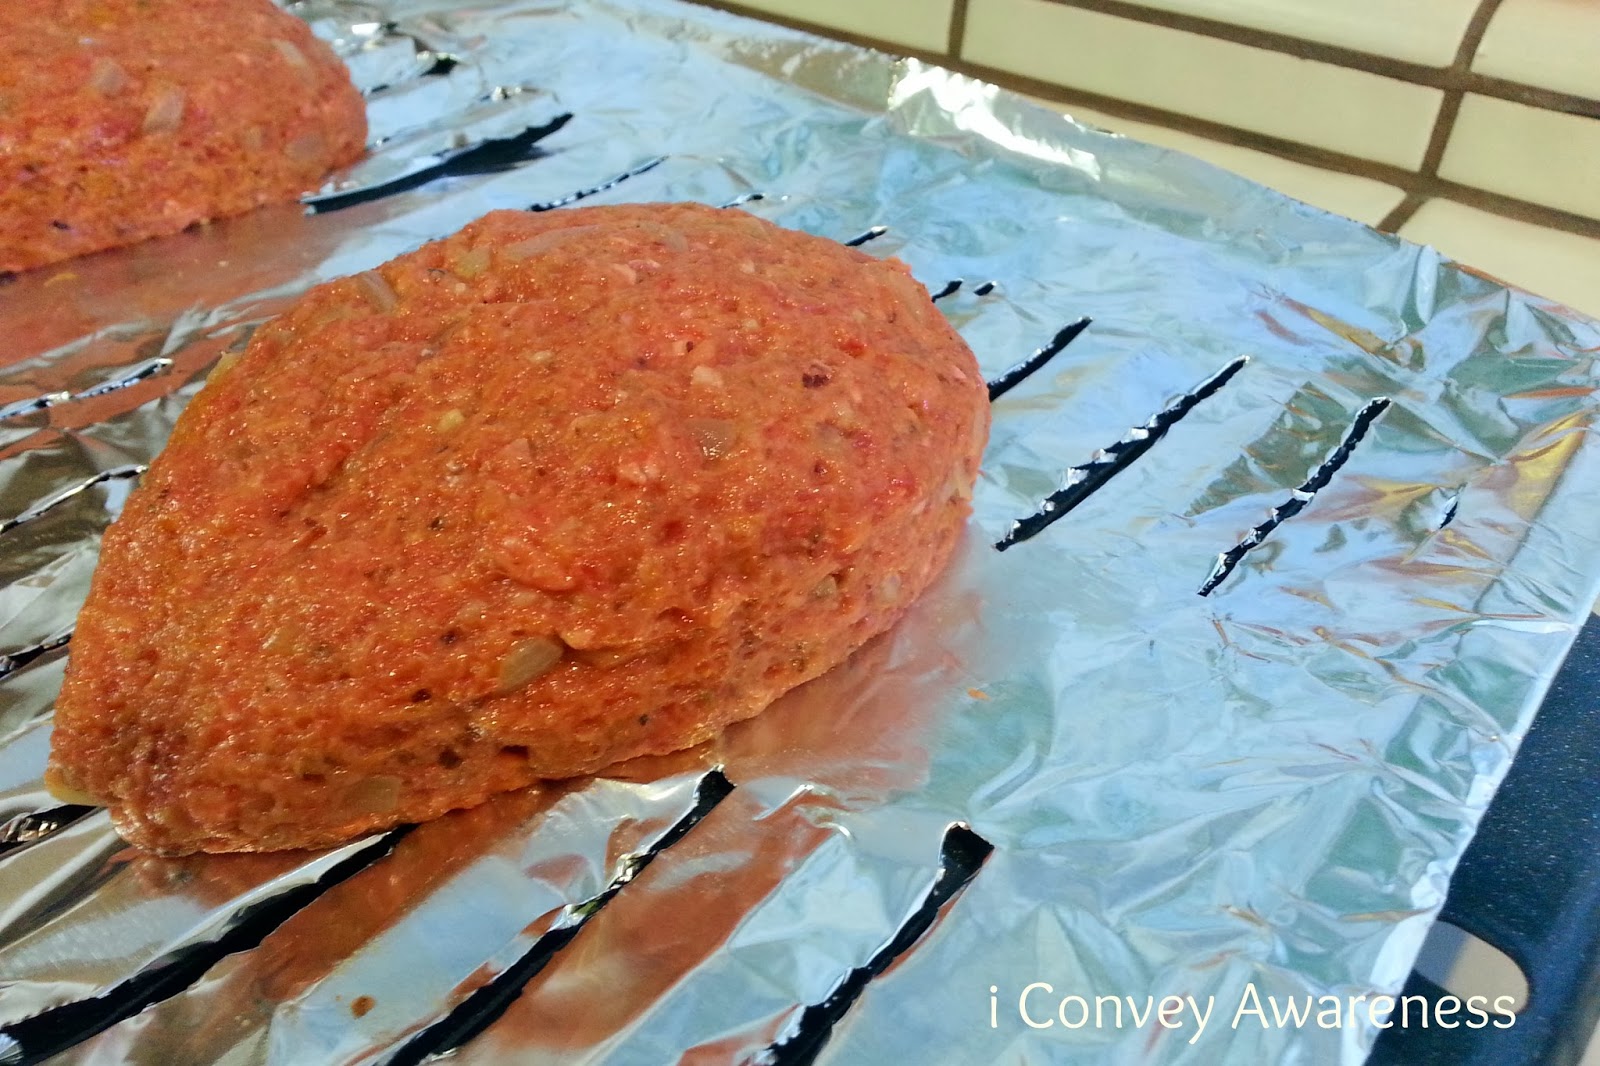

In a bowl, combine all ingredients incorporating onions and garlic last. Shape loaves with your hands and bake for 40 minutes. Internal temp must reach 160. 


While the meatloaf is baking, you'll be preparing your green beans and mashed potatoes. Cut off the ends as shown above. You will add spring water to the pan that you cooked the onions and garlic in. 


When water comes to a boil, add the green beans in carefully and blanch them for 3 minutes. Drain the beans saving the water from the pot. You'll need this again for the mashed potatoes. Note: Using the same pan for an entire meal helps develop flavors so that each dish has a hint or two of the other items on the plate.


While waiting for the water to boil, make a marinade for the green beans. You'll need 1/4 cup EVOO, the chopped onions, 1/2 tsp minced garlic and 1 tsp dried oregano. 


When beans have been drained, coat them with the marinade. Roast in the oven at 350 for 20 minutes. Don't rinse the bowl. You'll use this for your potatoes. 


While the meatloaf is baking and the green beans are roasting, boil the water from the drained green beans (may need to add more spring water as necessary). Wash, peel, and cut the potatoes and boil them until the right texture - about 10 minutes. Drain the potatoes and toss them in the bowl from the marinade. (No image.) Mash potatoes with 3 T butter and a splash of the almond-coconut milk. Add S&P as necessary. 

Your dinner will be done from start to finish in about 60 minutes. If you have a double oven, it helps with completion. If not, no worries - you're baking the meatloaf and roasting the green beans at the same temperature. 

Choose, eat, and live well! =)

Be sure to follow Life Made Full on Facebook


Thursday, December 5, 2013

My Chiropractor Visit

I attended a Health & Wellness Fair in Tehachapi, CA on 10/5/13 and visited a chiropractor's booth. His sign said: Dr. Robison will give you $5 if he can't find a weak muscle in your body. I went up to the table and said, you can keep your $5 because you'll find weakness in my arms. Though I've been going to the gym regularly for 6+ weeks, my true strength is in my lower half. I am working on the top half. My assumptions were correct so I booked an appointment to see him in my city. 

On the forms, I shared that I do not take any OTC or pharma meds but that I eat Juice Plus+ and take fish oil. I also shared with him that I'm a certified health coach and that I've been leading a 6-week #ctransc (Clean Transformation Challenge. See week 1, week 2, week 3, week 4, week 5, and week 6 posts for more information).


I met with him last week and he said I was his first patient that only had one bad spot in my back and that overall my back is very strong. To my surprise! My top half is coming along!! The arms, well, they're on their way. He adjusted my traps, clavicle, pecks, and sternum. He adjusted my right ankle and the top right of my back. He performed some muscle testing in addition to the "rack 'em and crack 'em."He said that he doesn't foresee me having to come back often that "I'll maintain very well" between adjustments. 

He said that I'm in good shape and that my ligaments are healthy and it's evidence of my clean eating and fitness.

More information about what we eat and how it affects the musculoskeletal system, see the Healthy Eating article about "the health of tendons and ligaments, and getting key nutrients to help keep tissues healthy and functional."

Learn more about my Clean Transformation Challenge here to make your wellness a lifestyle choice, not a fad, diet, or trend. 


Subscribe to my blog here to never miss a post.
Follow me on Facebook, Twitter, and Pinterest.
Download my free eGuide when you subscribe to my monthly newsletters for free.

Choose, eat, and live well! =)


Tuesday, December 3, 2013

Updated: Make your own body butter with 4 ingredients.

Update: I originally shared information about Vitamin E being used as a preservative, but in fact it isn't. It is an antioxidant that extends shelf life by preventing rancidity. DIY products that don't use water do not need a preservative; however, it is necessary that with this body butter and other recipes like these that you must use clean, dry fingers to prevent mold, yeast, bacteria, fungi, etc. In my quest for cleaner, safer products, I'm still learning the ins and outs. Other ingredients that prevent rancidity are rosemary oleoresin extract and grapefruit seed extract.  

This post is inspired by Scratch Mommy. I asked her how I can make a DIY body butter using coconut oil as the main ingredient. She gave me some guidelines and this is what I came up with! It was my first time whipping coconut oil into a body butter and I have to admit, it came out well. Now, I must mention that I don't know how it will hold out in the warmer months but in the coolness of late Fall, it's perfect! 

My body butter had a very light lavender scent. I will never tire of the scent of lavender. Can you relate? 


Ingredients
1/2 cup coconut oil (solid)
1/2 T avocado oil 
1 tsp Vitamin E (
5 drops of lavender essential oil (EO)

Preparation
In your mixer, whip the coconut oil until light and fluffy. It may take several minutes. As peaks form, drizzle in the avocado oil. Continue whipping for a minute or two then add in the vitamin E. Finally add the EO of your choice. 

Tips
+ You can use any high quality skin oil like jojoba, almond, in place of the avocado oil.
+ The Vitamin E serves as a preservative is an antioxidant which extends shelf life by preventing rancidity and it's added nourishment to your skin. Find a brand that doesn't have a corn (or GMO) derivative in the ingredients. Vitamin E alone is a sticky substance and requires a carrier oil to make it fluid.

Info on EOs
The EO pictured above is from an artisan I met at last year's Holiday Craft Bazaar in Ridgecrest, CA. Her handcrafted EO is superb! The 1 oz lavender is $20 plus shipping (pictured is the 1/3 bottle at $7). You can learn more by contacting her at email (remove spaces and parentheses): DanaClair (@) rocketmail.com. She lives in Bishop, CA. 

Another place I've purchased EOs is Organic Infusions. They are also a small business and based in California. 

In my next rendition, I am thinking of using cocoa butter and a smidgen of raw honey with the Vitamin E. Essential oil may not be needed since cocoa butter has a light chocolate scent. Though a peppermint EO may make me smell like a peppermint patty and that could be kind of refreshing in the winter months ahead. What EO would you pair with cocoa butter? 

Share your favorite DIY body butter recipe or resource in the comments. 


Choose, eat, and live well! =)

Monday, November 25, 2013

Ooh La La French Toast with Plant Protein

I created this recipe for a fan on Instagram. My #youknowyouwantsome tag line got her to say, 'Yes, I want some. How do you make it?

Here it is, Just Add Laughter, the recipe for Oh La La French Toast. Maybe after this posting, you'll be ready to add JP+ Complete to your daily regimen?!


Ingredients:
6 eggs
1/2 cup non dairy milk (almond, coconut, almond-coconut or your choice)
2 tsp vanilla extract (like this or DIY here)
1/2 cup vanilla Complete plant protein powder (like this) (DF/GF)
1/2 tsp cinnamon (like this)
8-10 slices of bread (choose your own)

Other Ingredients:
Coconut oil (or dairy-free alternative) for skillet
1-2 bananas sliced
Maple syrup (like this)
2 tsp sliced almonds (like this)


Directions:
1. Add some coconut oil (or dairy free alternative) to the skillet and heat on medium-low.
2. Whisk eggs and non dairy milk. Add vanilla extract, whisk. Add Juice Plus+ Complete, whisk. Add cinnamon and whisk until just incorporated.
3. Dip bread in both sides. Don't let the bread absorb too much liquid. Just a second or two on each side. Place in pan and cook for 2 minutes until golden brown on each side.
Tip: You may need to add more coconut oil to the skillet as you go along. 
4. Top with sliced bananas, sliced almonds, and maple syrup. 

Choose, eat, and live well! =)


I do receive a small commission from Amazon.com if you purchase anything through their site using one of the links above (read my full advertising disclosure here). 

Thank you very much for your generosity in helping to offset the costs of website upkeep, so that I can keep sharing wellness resources with my community and beyond.